The Installation of a fully Automatic Robot Lawnmower
The installation process for a robotic lawnmower depends on if you decide to install yourself or purchase a professional installation. Read on to find out how to do both.
If your garden is smaller and you’re interested in a cheaper alternative take a look at the Gardena sileno robot mowers on our other website.
Process of a professional installation
We are Husqvarna Automower Authorised installation specialists
- You will need to make contact via our contact page
- We will briefly discuss the Lawn size and shape etc
- Arrange a site visit to view your lawn (Free of Charge)
- We provide a written quote
- Quote accepted and installation date set
- Robotic Lawnmower Installation is completed
Its that easy you now have a perfectly cut lawn all of the time !
View Case studies to see if you can find a lawn similar to yours.
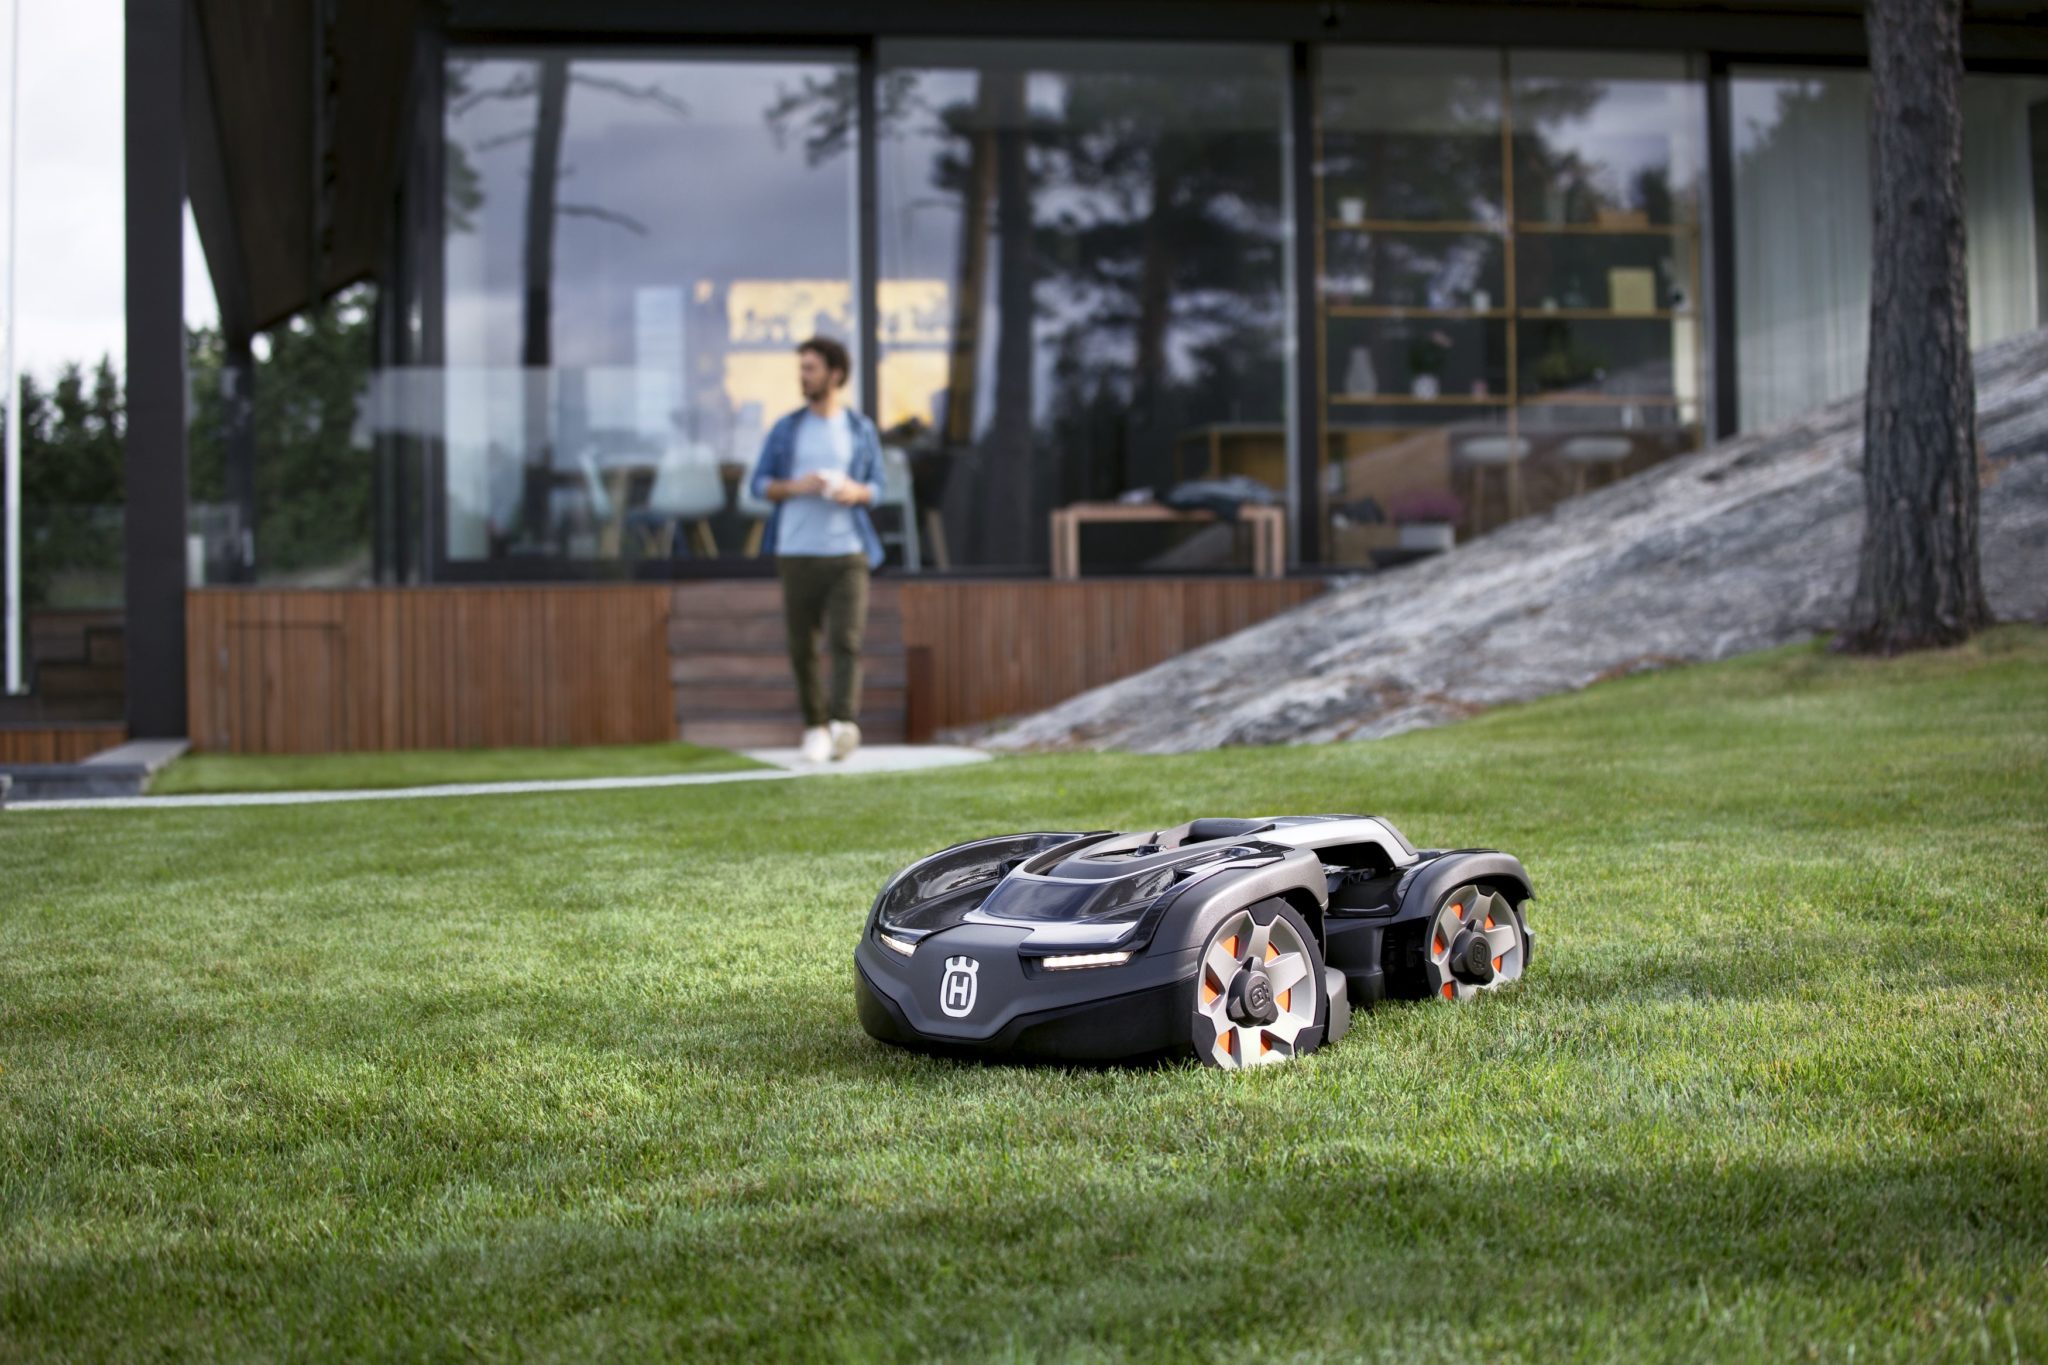
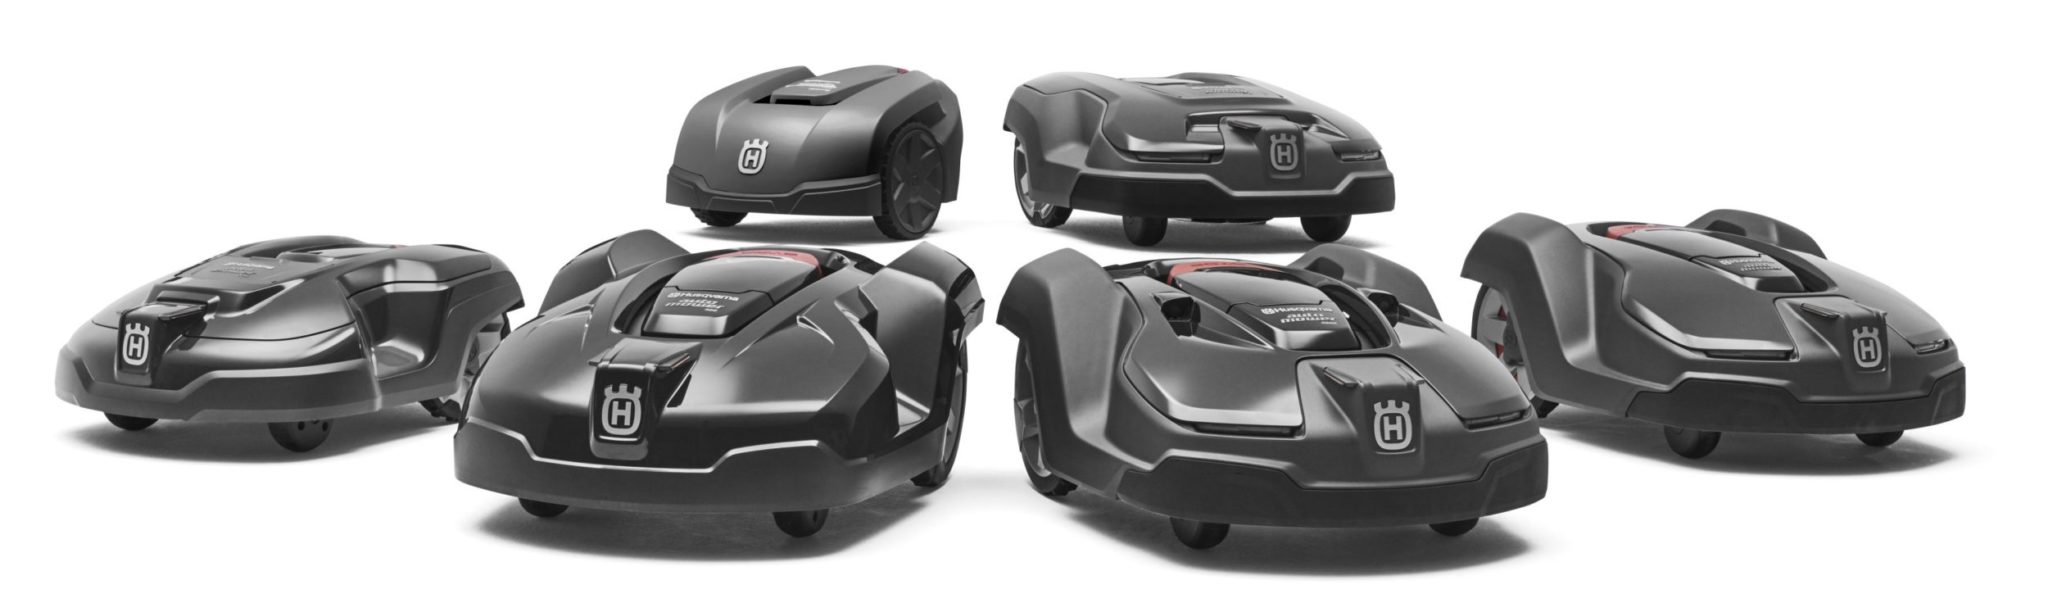
Automower 435x AWD
Making contact
Three main methods 01594 841 014, support@mincost.co.uk or you can fill in the form on our contact page.
Brief discussion
We will need to get some contact details from you, name, address, email and telephone number. A few questions will be asked about your lawn but we don’t expect you to no the exact size or the gradient of slopes so no need to worry if your unsure about this. This is also your chance to asked us any questions about Robot Lawnmowers. We can arrange the site visit during this call as well if you wanted.
Site Visit / Survey
Some of this may be done via satellite mapping. Our technician will spend as much time as necessary to explain how the robot mower could help you, how it would operate, and a rough plan will be formulated of how the installation will look and how it will work. We allow plenty of time for this stage to allow measurements to be taken and to allow us to understand all of your requirements, including various optional extras available for each machine.
Our installation team will answer all of your questions at this point plus any subsequent queries by telephone or email. We ensure that the robot lawn mower will be compatible with your garden, and you know what will happen and what you will get.
Once we understand your needs, and you understand what the robot can do for you, we will design an installation that works – our technicians have extensive experience of many garden scenarios and we haven’t been beaten yet.
The Quotation
Once we have gathered the information we require we then provide a written quotation; this will include our recommendation for suitable machines, a price for each, including installation. we may also list accesories that you might want as well as any recommendations for changes to your lawn to make a Robot Lawnmower work more efficiently.
We can also quote for the machine plus installation materials only, if you wish to self-install. For this option we provide telephone and email support for 30 days to assist you to achieve a successful installation.
From here on, the ball is in your court – there will be no pressure to purchase. If and when you decide an Automower or iMow is for you, an install date will be agreed. A deposit will be required at this time for the value of the lawnmower.
If you have further questions at this point, please ask away – we never stop responding to questions. The Mincost mRobot Automower and iMow installation service will include telephone, e-mail and if necessary, onsite support for 3 years from date of installation.
Robot Mower Installation
- Preparation
- Installing of the charging station
- Charging the battery
- Installation of the boundary wire
- Connecting the boundary wire
- Installation of the guide wire
- Checking the Installation
- Test docking with the charging station
Preparation
- To make sure your lawn is ready for an install you will need to cut and collect the grass if its longer than 10cm.
- It is also advisable to have a look around to see if you have any holes or hollows that need filling in.
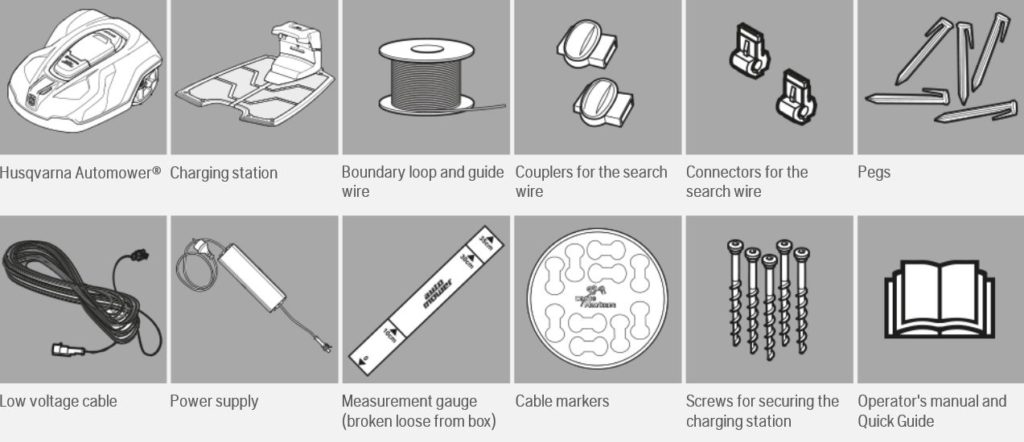
- Check to make sure you have all the parts for the installation
- Robotic Lawnmower
- Charging Station
- Boundary wire
- Transformer
- Low voltage cable
- Pegs-unless you are burying the wire with a machine or spade.
- Connectors- for connecting to the back of the charging station
- Plastic screws for charging station
- Measurement Gage
- Couplers- to connect the guide wire
- Cable Markers
- Hammer preferably wooden or plastic
- Combination pliers
- Straight Spade
Installing the Charging station
The charging station must be positioned with a great deal of free space in front of it (at least 3 m / 10 ft). It should
also be centrally placed in the working area to make it
easier for the robotic lawnmower to reach all areas in the
working area
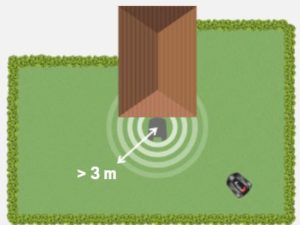
Do not put the charging station in confined spaces in the working area. This can make it difficult for the robotic
mower to find the charging station.
The charging station must be positioned on relatively level ground. The front end of the charging station may
be a maximum of 5 cm / 2 ” higher or lower than the back end.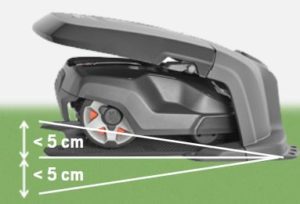
Connection of Power Supply (Transformer)
Take the following into consideration when planning
where to place the power supply:
• Close to the charging station
• Protection from rain
• Protection from direct sunlight
If the power supply is connected to an electrical socket
outdoors, it must be approved for outdoor use.
The low voltage cable for the power supply is 10 m / 33 ft
long, and may not be shortened or extended. A longer low
voltage cable is available as optional accessory.
It is not allowed to connect the power supply directly to
the charging station. The low voltage cable must always be used.
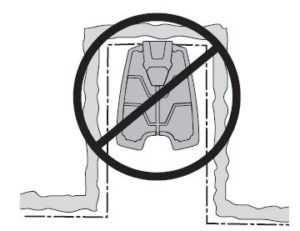
Installation of the boundary wire for your robot lawn mower
The boundary wire can be installed in one of the following ways:
- Cable laying machine used by one of our technicians
- Secure the wire to the ground with pegs.
It is preferable to peg down the boundary wire if you want to make adjustments to the boundary wire during
the first few weeks of operation. After a few weeks the grass will have grown over the wire making it no longer
visible. Use a hammer/plastic mallet and the pegs supplied when carrying out the installation. - Bury the wire.
It is preferable to bury the boundary wire if you want to dethatch or aerate the lawn. If necessary, both
methods can be combined so one part of the boundary wire is pegged down and the remainder is buried. The
cable can be buried using for instance an edge cutter or a straight spade. Make sure to lay the boundary wire
at least 1 cm / 0.4 ” and a maximum of 20 cm / 8 ” in the ground.
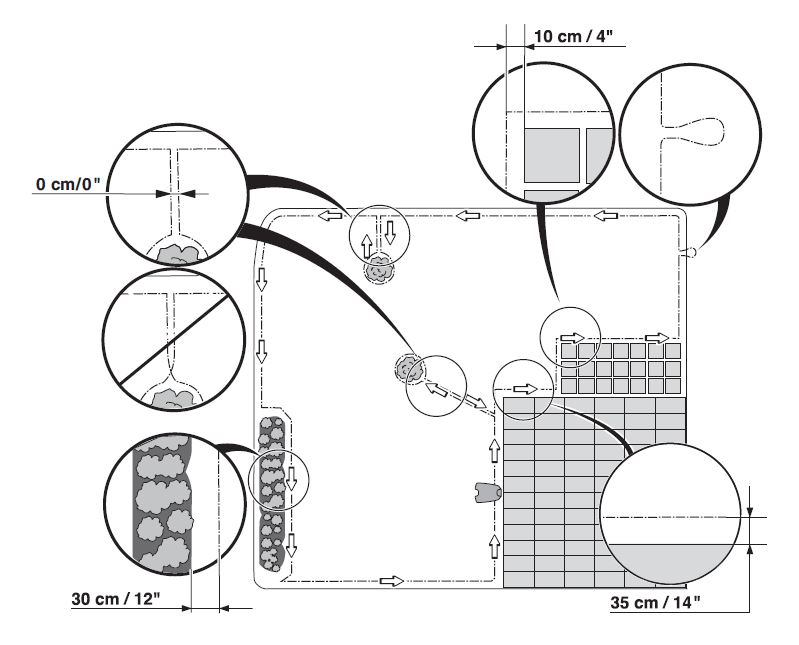
Measurements are a rough guide, please remember to check measurements for your specific Robot Lawnmower.
Remember to leave a loop for guide wires. without this extra loop connecting the guide wire will be difficult and you will most likely need to an in extra wire .
Laying the boundary wire in towards the charging
station
On its way toward the charging station, the boundary wire
can be laid completely outside the charging station (see
option 1 in the figure). If there is a need to partly locate
the charging station outside the working area, it is also
possible to lay the wire under the charging station plate
(see option 2 in the figure).
However most of the charging station must not be placed
outside the working area as the robotic lawnmower can
then find it difficult to find the charging station.
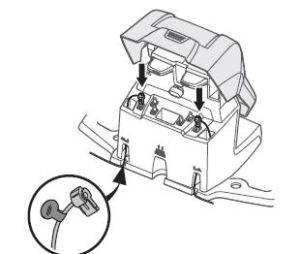
Connecting the Boundary Wire
Connect the boundary wire to the charging station:
Place the wire in the connector and press together with a pair of pliers until you hear a click.
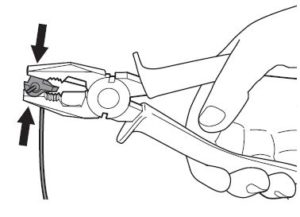
Tilt the protective cover on the charging station forward and run the wire ends up each channel at the rear of the charging station.Press the
connector onto the contact pin, marked AL (left)
and AR (right), on the charging station.
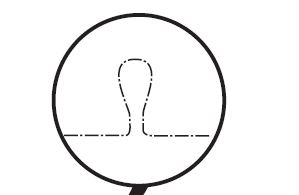
Installation of Guide Wire
The guide wire is a wire that is laid away from the charging station, for instance out towards a remote part of the working area or through a narrow passage and then
connected with the boundary wire. You connect this wire to the charging station in the same way you connected the boundary wire, but make sure the wire comes directly from the front and underneath the charging plate. Please note you may have more than one guide wire available, theses cannot cross each other.
Checking the Installation
So you have connected power and all boundary wires and guide wires are attached.
Husqvarna Automower docking stations will show a green light on the docking station if all wires have been connected correctly.
You will need to make sure your robotic lawnmower is charged, manually push the robotic lawnmower into the docking station. Charging times vary depending on the machine but roughly 90 mins will be sufficient for 90% of robotic Lawnmowers to recharge.
After you have gone through the start up process on the robot lawnmower you should test that its docks correctly. To do this simply pull the Robot mower out of the docking station and then press park, watch to make sure it parks without issue.
To help we have written a short blog showing the main differences between self install or Professional Robot Lawnmower Install.
If you have got all the way through that we hope it has given you a good insight into a robotic lawnmower installation.
Below is a video of how to install a robotic lawnmower.